RecyclerView를 사용하다 보면 아이템들을 구분하기 위해 divider를 넣는 경우가 많이 생긴다. 보통 이런 경우에 아래 코드처럼 아이템에 View를 추가하여 만들곤 한다.
<View
    android:width="match_parent"
    android:height="1dp"
    android:background="#000000" />
하지만 이런 방식으로 divider를 추가해주면 몇 가지 문제가 발생한다.
1. 성능에 영향이 간다.
- 레이아웃에 불필요한 뷰를 추가함으로써 레이아웃 계층이 증가하게 되고 그에 따라 성능에 좋지 못한 영향을 끼친다.
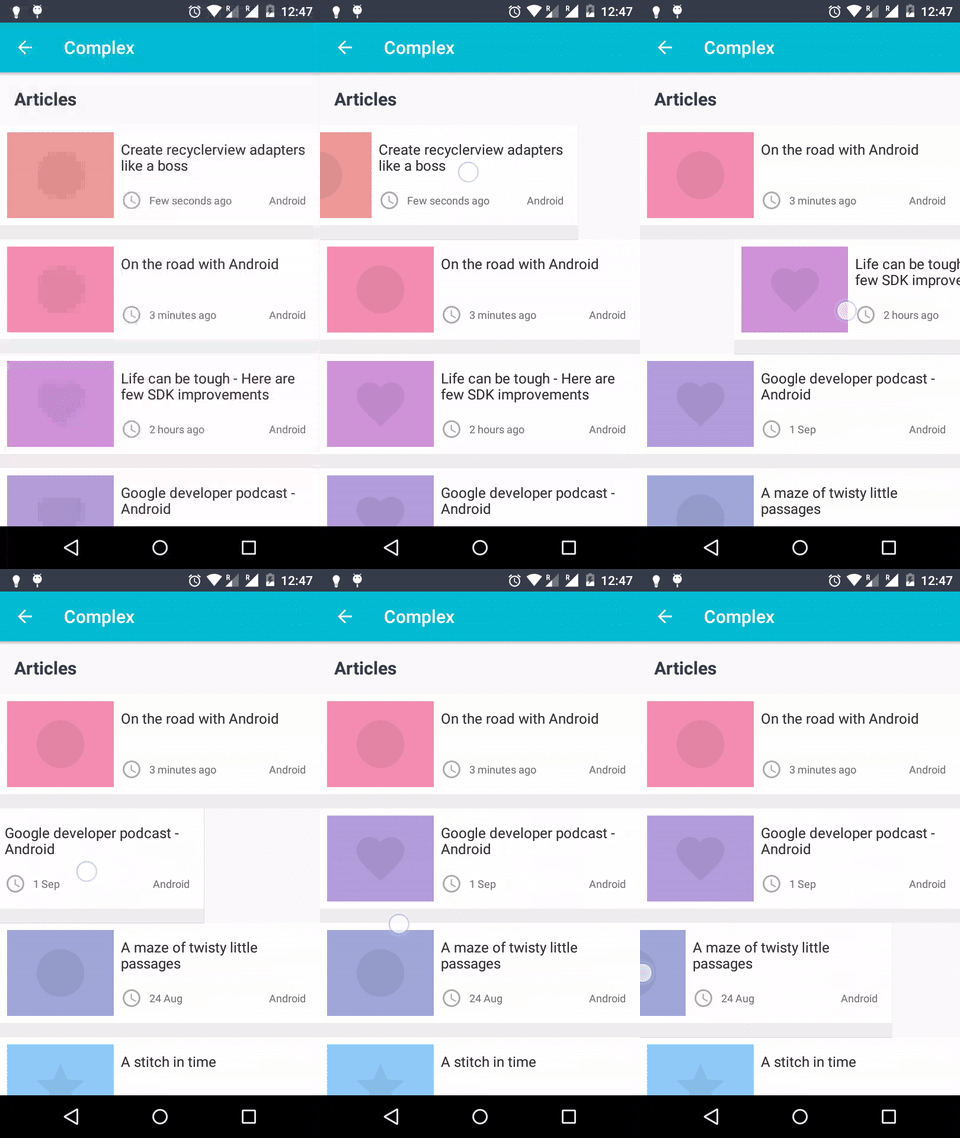
2. 좌우 스와이프 하는 애니메이션이 있다면 divider도 함께 움직인다.
- 각각의 아이템에 View로 추가한 방식이기 때문에 아래 사진처럼 스와이프 동작이 있다면 구분선이 함께 움직이게 된다.

3. 각각의 divider를 컨트롤하기 힘들다.
- View로 구분선을 추가한다면 각각의 구분선을 조절하기가 힘들다. 원하는 조건에 맞춰서 visible 처리는 해줄 수 있어도 아래 사진과 같이 더 많은 기능이 필요하다면 까다로워진다.

따라서 RecyclerView에 divider를 넣어줄 때는 ItemDecoration이 권장된다. 구글 공식 문서에서는 ItemDecoration을 다음과 같이 설명한다.
An ItemDecoration allows the application to add a special drawing and layout offset to specific item views from the adapter's data set. This can be useful for drawing dividers between items, highlights, visual grouping boundaries and more.
1. 간단한 divider 추가
정말 간단하게 divider 추가하고 싶다면, DividerItemDecoration을 사용하면 된다.
val decoration = DividerItemDecoration(this, VERTICAL)
recyclerView.addItemDecoration(decoration)
2. 커스텀 divider 추가
만약 간단한 divider가 아닌 여러 가지 기능을 추가해야 한다면 ItemDecoration을 상속받아 CustomDecoration을 구현해서 설정해줄 수 있다. 커스텀 방법에는 여러 가지 방법이 있지만 이번 글에서는 divider의 높이와 좌우 패딩, 색깔 정도만 설정해주려고 한다.
class CustomDecoration(
        private val height: Float,
        private val padding: Float,
        @ColorInt
        private val color: Int
) : RecyclerView.ItemDecoration() {

    private val paint = Paint()

    init {
        paint.color = color
    }

    override fun onDrawOver(c: Canvas, parent: RecyclerView, state: RecyclerView.State) {
        val left = parent.paddingStart + padding
        val right = parent.width - parent.paddingEnd - padding

        for (i in 0 until parent.childCount) {
            val child = parent.getChildAt(i)
            val params = child.layoutParams as RecyclerView.LayoutParams

            val top = (child.bottom + params.bottomMargin).toFloat()
            val bottom = top + height

            c.drawRect(left, top, right, bottom, paint)
        }
    }
}
val customDecoration = RecyclerViewDivider(10f, 10f, Color.BLUE)
recyclerView.addItemDecoration(customDecoration)
3. xml에서 divider 추가 - BindingAdapter 사용
ListView에는 xml에서 divider를 설정할 수 있는 android:divider와 android:dividerHeight 속성이 있다.
<ListView
    android:layout_width="match_parent"
    android:layout_height="match_parent"
    android:divider="#000000"
    android:dividerHeight="1dp"/>
하지만 RecyclerView에는 이와 같은 속성이 없고, 위에서 했던 것처럼 자바 혹은 코틀린 소스에서 설정을 해줘야 한다. 프로젝트를 하며 일일이 추가해줘야 하는 부분이 너무 귀찮았고, BindingAdapter를 사용해서 xml에서 사용할 수 있게끔 만들어봤다.
@BindingAdapter(
        value = ["dividerHeight", "dividerPadding", "dividerColor"],
        requireAll = false
)
fun RecyclerView.setDivider(dividerHeight: Float?, dividerPadding: Float?, @ColorInt dividerColor: Int?) {
    val decoration = CustomDecoration(
            height = dividerHeight ?: 0f,
            padding = dividerPadding ?: 0f,
            color = dividerColor ?: Color.TRANSPARENT
    )

    addItemDecoration(decoration)
}
<androidx.recyclerview.widget.RecyclerView
android:layout_width="match_parent"
android:layout_height="wrap_content"
app:dividerHeight="@{@dimen/dp_1}"
app:dividerColor="@{@color/gray_300}"
app:dividerPadding="@{@dimen/dp_2}"
app:layoutManager="androidx.recyclerview.widget.LinearLayoutManager"/>
참고
readyandroid.wordpress.com/recyclerview-itemdecoration-in-android/
RecyclerView ItemDecoration in Android
Part 1 : Avoid adding dividers to the view layout ItemDecoration can be drawn to all four sides of RecyclerView items First things first. So what is ItemDecoration? This is how official doc puts it…
readyandroid.wordpress.com
'프로그래밍 > Android' 카테고리의 다른 글
| [Android] Room (4) | 2023.11.21 |
|---|---|
| [Android] 숫자 천단위 콤마찍기 (0) | 2023.07.20 |
| [Android] getExternalStorageDirectory() deprecated (0) | 2023.05.24 |
| [Android Studio] AVD 실행시 no longer exists 에러 (0) | 2023.05.15 |
| [Android] EditText 밑줄제거 및 커서 커스텀 (0) | 2023.04.24 |


댓글